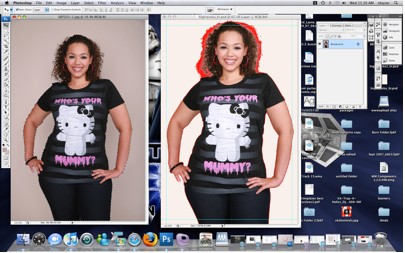
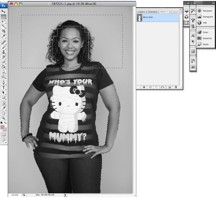
Clients and friends alike regularly ask me to help them superimpose the image of a person onto another background.
The first problem is hair and the opacity between the hairs. Adobe Photoshop offers a tool called the “magic wand”. While this tool can get you a quick idea of the composition, you will soon realize the selection is rarely perfect, even if you “feather” the selection to soften the edges.
This tutorial will get you terrific results using alpha channels that have been available in Photoshop since it’s earliest days.
Thanks to Ed Layne for putting this together for me.
Good luck and good imaging!
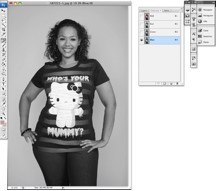
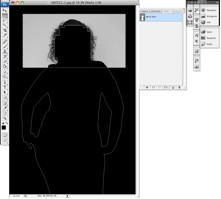
1. Select the Blue Channel (channel with the highest contrast).
2. With the magic wand tool select the background.
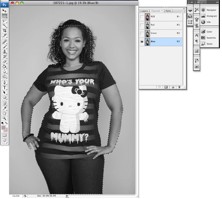
3. Invert the selection (command+shift+i).
4. With the marquee tool, hold down the option key to remove the edges of the hair from your selection.
5. From the Paths window pull-down menu, select Make Work Path… and deselect the Work Path.
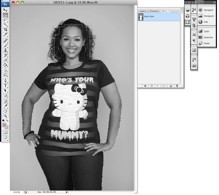
6. With the marquee tool, select the area to be masked, loose hair around head.
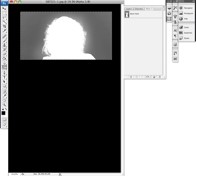
7. Select the Blue Channel and copy the selected area.
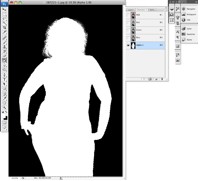
8. Create a new alpha channel and paste your selection into the new alpha channel.

9. Choose the Burn Tool to darken the hair to nearly black (set shadows with exposure less than 18% in the adjustment palette).
10. Choose the Dodge Tool to lighten the background to white, careful to allow loose hair to remain grey.
11. Invert your selection (command+i) and deselect (command+d).
12. Turn on your Work Path, select the path, Load Path As Selection and fill with white.
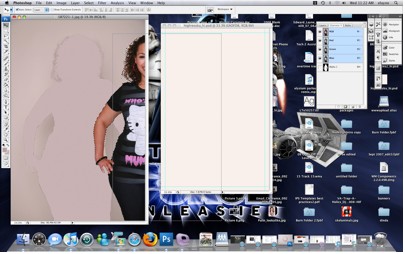
13. Paint areas of face and hair that were not burned to white.
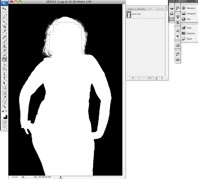
14. Load your alpha channel as a selection.
15. Select your RGB channel and extract your image.
16. Once your image is placed into your new image temporarily turn on the stroke in your adjustment layers palette to find and erase any ghost pixels.